Atomsk
The Swiss-army knife of atomic simulations

The Swiss-army knife of atomic simulations


In this tutorial, you will learn how to construct nanopillars of different shapes and crystal orientations.
▶ For more information, refer to the corresponding documentation page.
Before creating the nanopillar, we need a cell of bulk material. This cell must have the crystal orientation of the final nanopillar. For example, let us create a supercell of gold:
atomsk --create fcc 4.08 Au -duplicate 40 40 40 Au_cell.xsf
Alternatively one can create a unit cell with a specific crystal orientation:
atomsk --create fcc 4.08 Au orient [110] [1-10] [001] -duplicate 40 40 30 Au_cell.xsf
You can also create a unit cell with a different orientation, with Atomsk or with another program. No matter what unit cell you use, in the following it is assumed that it is called "Au_cell.xsf".
In order to "carve" a nanopillar in the supercell, we want to remove all atoms that do not belong to the nanopillar. In Atomsk this can be achieved with the option -select. For instance, to create a rectangular nanopillar, we select atoms that are outside a rectangular box, and then remove the selected atoms:
atomsk Au_cell.xsf \
-select out box 0.2*box -INF 0.2*box 0.8*box INF 0.8*box \
-remove-atom select \
nanopillar.cfg
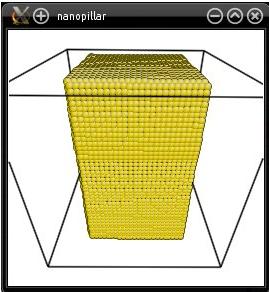
Visualization with Atomeye shows how the system was cut:
Alternatively, it may be desirable to leave some layers of atoms at the base of the nanopillar. This can be achieved by using the option "-cut", instead of the option "-remove-atoms". For instance, let us leave a layer of 20 Å at the bottom of the cell:
atomsk Au_cell.xsf \
-select out box 0.2*box -INF 0.2*box 0.8*box INF 0.8*box \
-cut above 20 Y \
nanopillar.cfg
As explained in a previous tutorial, this option will "cut" (i.e. remove) all atoms that have a Y coordinate greater than 20 Å. However, since it is used after the option "-select", only selected atoms are removed. As a result, only atoms that are outside of the pillar and that have a Y coordinate greater than 20 Å are removed:
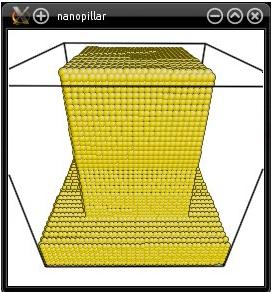
This example shows that after the option "-select" is used, the following options apply only to the selected atoms (and not to all atoms).
The principle is very similar to the previous example, except that in the option -select we will select a cylinder. One must provide the axis of the cylinder (here Y), its position in the plane normal to that axis (here at the center of the box), and its radius in Å:
atomsk Au_cell.xsf \
-select out cylinder Y 0.5*box 0.5*box 40 \
-cut above 20 Y \
nanopillar.cfg
This time the nanopillar will indeed have a cylindrical shape:

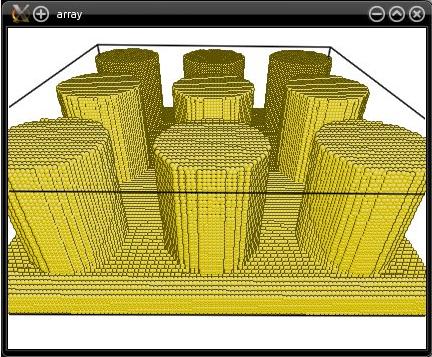
Once you have created a nanopillar, it is quite straightforward to generate an array of nanopillars: simply use the option "-duplicate". For instance, to duplicate the cylindrical nanopillar created above:
atomsk nanopillar.cfg -duplicate 3 1 3 array.cfg
With the examples above, you can easily modify the size of the box, the radius of the nanopillars, their crystallographic orientation, and so on.
You may also begin with a unit cell of a different element, with a different lattice (e.g. diamond or hcp), and then use the commands above to generate nanopillars.
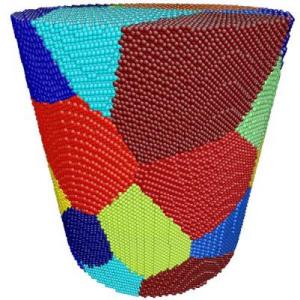
After you learn how to generate a polycrystal with Atomsk, you may even use such a polycrystal as a starting cell, and carve a cylinder into it, as shown in the example below!