Atomsk
The Swiss-army knife of atomic simulations

The Swiss-army knife of atomic simulations


This tutorial explains how to design grids or masks to select atoms.
▶ For more information, refer to the corresponding documentation page.
Previous tutorials explained how to select atoms according to geometric shapes: box, sphere, cylinder, and so on. Sometimes these simple shapes are not suited to design an atomic system.
With Atomsk, you can design your own masks as text files, and use them to select atoms. Then, you may do what you want with those selected atoms: remove them, substitute them, shift them, and so on.
In the following of the tutorial, a 40x40x3 supercell of aluminium will be used. It may be generated with Atomsk:
atomsk --create fcc 4.046 Al -duplicate 40 40 3 Al_supercell.xsf
First, let us construct a mask. For that, we have to write 0 and 1 into a text file, according to the desired pattern. For the sake of example, let us create the following mask, and save it in the file "mask.txt":
         000000000000000000

         000011000001111000

         001111000011001100

         000011000000011000

         000011000000110000

         000111100011111100

         000000000000000000

         000000000000000000
It can be recognized that the ones form the number "12", and the zeros fill the background. It is a simple pattern, but it will suffice as an example for this tutorial.
Of course, you may design your own custom masks. When designing such a text file, there can be any number of lines as you like, and the lines can be of any length -however all lines should have the same length.
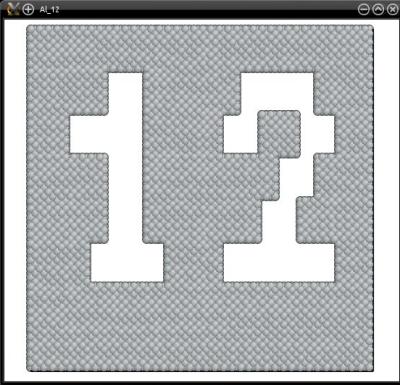
Now, let us use this mask to remove atoms. We use the option "-select grid" to specify the text file containing the mask, and then the option "-remove-atoms" to remove selected atoms:
atomsk Al_supercell.xsf -select grid mask.txt -rmatom select Al_12.cfg
With this command, Atomsk reads the file "mask.txt", and scales the mask to fit the dimensions of the actual atomic system. Then, all atoms that are inside the "1" of the mask are selected, and the others are not. Finally, selected atoms are removed by the option "-rmatom select". The final atomic system is written into the file "Al_12.cfg", which can be visualized with Atomeye:
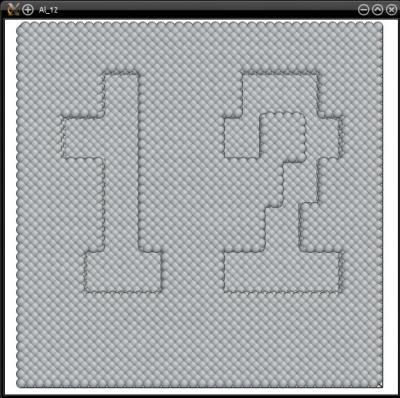
Instead of the option "-remove-atoms", it is possible to use the option "-cut" to remove only atoms above a given height:
atomsk Al_supercell.xsf -select grid mask.txt -cut above 4.1 Z Al_12.cfg
This way, only the surface atoms (whose Z coordinate is greater than 4.1 Å in this example) are removed:
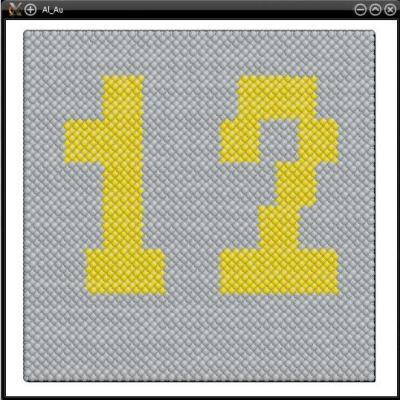
Naturally, instead of removing atoms, it is possible to substitute them with atoms of another species. For that, use the option "-substitute" after the option "-select", for instance:
atomsk Al_supercell.xsf -select grid grid_1.txt -substitute Al Au Al_12.cfg
With this, the selected aluminium atoms will be replaced by gold atoms:
More generally, after defining a selection, any subsequent option applies only to the selected atoms. So, it is possible not only to remove or substitute atoms, but also to shift them, deform, rotate, assign a velocity distribution, and so on. You may refer to the documentation of these options to know more.
The previous masks were simple enough to be generated by hand, but may be completely impractical if we want to design a mask with a complex pattern. In such cases, it may be desirable to design the pattern with an external software (such as GIMP or similar softwares) that produces an image in JPEG or PNG format.
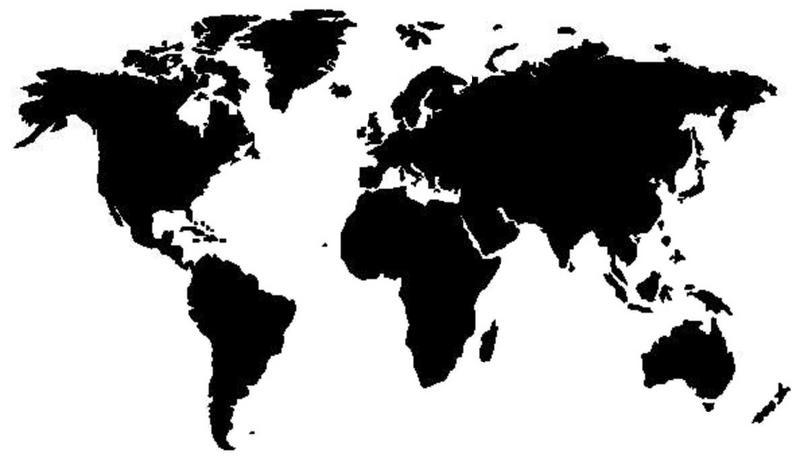
If you have an image you would like to use as a mask, the first thing to do is to convert it into a text file suitable for Atomsk. This can be achieved with tools like jp2a. For the sake of example, imagine that you have the following image: World_Map.jpg (right-click to download it), and you want to convert it into a text file containing only zeros and ones. You can use jp2a in the following way:
jp2a --chars="01" --width="200" World_Map.jpg > World_Map.txt
The "--chars" option indicates to convert the image using only the characters "0" and "1". The number of characters per line can be set with the option "--width"; here there will be 200 characters per line (the height or number of lines will be adjusted automatically to keep the image ratio). Finally, the output is redirected into a text file named "World_Map.txt".
Now that we have a text file, we can use it as a mask in Atomsk:
atomsk Al_supercell.xsf -select grid World_Map.txt -rmatom select Al_World.cfg
As before, Atomsk automatically scales the mask to the dimensions of the atomic system. You may visualize the final system:
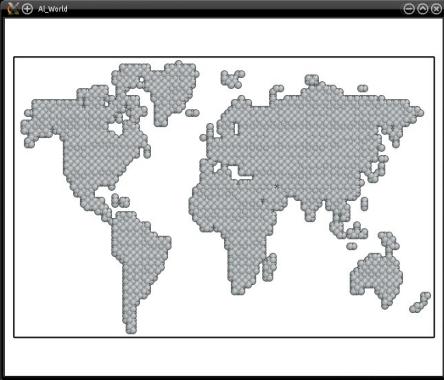
With this method, any image can serve as a mask for any atomic system. You may try with your own images. It is recommended that the images have a very high contrast (typically black and white without any shades of gray) so that it can be unambiguously converted into 0 and 1.
Similarly, it is also possible to design 3-D masks, although this may prove a bit more tedious. In this case, several grids similar to the above appear in the text file, and the 3-D atomic system is sliced in as many parts to achieve the selection.
As a simple example, let us construct a 3-D mask made of four "slices", each containing a different pattern than the others. The file must start with three integers, indicating the number of slices in each Cartesian direction; in this case, each slice is a 5x5 array, and there are 4 slices along the Z direction. Then, each slice must appear with the given dimensions:
        5 5 4


        10000

        01000

        00100

        00010

        00001


        00000

        00100

        01110

        00100

        00000


        00100

        00100

        11111

        00100

        00100


        00001

        00010

        00100

        01000

        10000
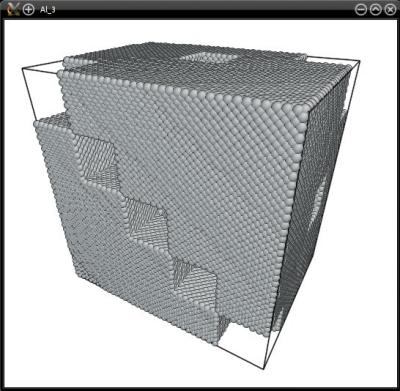
Then, make sure that your atomic system is 3-D. The supercell of aluminium that we created at the beginning of this tutorial is not, so we will duplicate it ten times along Z before applying the mask. Finally, you can use the option "-select" as before to select atoms according to this mask. Let us use it to remove the selected atoms:
atomsk Al_supercell.xsf -duplicate 1 1 10 -select grid mask2.txt -rmatom select Al_3.cfg
Again, the system is cut into slices according to the dimensions of the grid (i.e. 5 slices along X, 5 along Y, and 4 along Z), and then atoms that belong to boxes marked "1" are selected. The final system can be visualized to check that the selection was correctly performed:
There is yet another way to specify 3-D masks: to provide the positions of nodes, and assigning each node a 0 or 1 value. Atomsk will then compute the interfaces between neighboring nodes, and generate a 3-D finite element grid (this is similar to the Voronoi decomposition used to generate polycrystals).
To define a finite-element grid, the text file must start with the keyword "Finite element". Then, each line must contain three real numbers giving the position (x,y,z) of one node, and one integer (0 or 1) specifying if atoms belonging to this node must be selected (1) or not (0). For instance, let us use the following file:
        Finite elements

        20 20 1 1

        30 1 20 0

        10 10 10  0

        5 40 6 0

        8 60 60 1

        20 20 20 0

        80 80 80 0

        60 60 5 0

        70 100 5 0
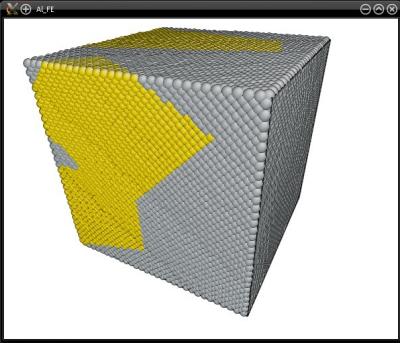
Now let us pass this grid to Atomsk, and use it to replace Al atoms by Au atoms:
atomsk --create fcc 4.046 Al -duplicate 30 30 30 -select grid FEgrid.txt -sub Al Au Al_FE.cfg
Visualization shows that atoms in the elements marked "1" have been substituted by gold:
The text file can contain as many lines (i.e. as many nodes) as you want, to achieve a very fine 3-D structure. Note however that the greater the number of nodes, the longer it will take Atomsk to construct the mesh and select the correct atoms.
Masks can be combined with other options and modes. For instance, you may generate a supercell of silicon, apply a mask to remove some atoms; apply the inverted mask to another atomic system (e.g. fcc Au); and finally, merge the two systems together. Since the mask was the same, the atoms of the second system will fill the voids in the first system.
Masks can be a quick and practical way to construct geometric shapes. However, for more complex 3-D shapes, it can be quite tedious to generate the text file that will serve as a mask. In such cases, it may be more practical to use a dedicated 3-D software to produce the complex 3-D shape, and then import it in Atomsk to select atoms. This is explained in the next tutorial.