Atomsk
The Swiss-army knife of atomic simulations

The Swiss-army knife of atomic simulations


This tutorial explains how to construct polycrystals containing grains of different phases.
▶ For more information, refer to the corresponding documentation page.
In a previous tutorial we learned how to generate polycrystals with Atomsk. Now, we will see how to construct polycrystals containing different phases, using as an example fcc copper and bcc tungsten.
Let us begin with the construction of a copper polycrystal, using the same procedure as the previous tutorial. First we need a unit cell of fcc copper:
atomsk --create fcc 3.61 Cu Cu_unitcell.xsf
Then we need a text file containing the parameters for the construction of the polycrystal. Let us use the same one as before:
         box 200 180 210

         node 0 0 0 [100] [010] [001]

         node 40 80 60 56° -83° 45°

         node 0.8*box 0.6*box 0.9*box [11-1] [112] [1-10]

         node 50 5 60 [110] [1-10] [001]

         node 0.75*box 0.3*box 0.45*box -31.4° 28.7° 90.0°

         node 60 100 80 random
Now we can run Atomsk with the mode "--polycrystal":
atomsk --polycrystal Cu_unitcell.xsf polycrystal.txt Cu_polycrystal.cfg
Naturally, this polycrystal will look similar to the polycrystal constructed in the previous tutorial:
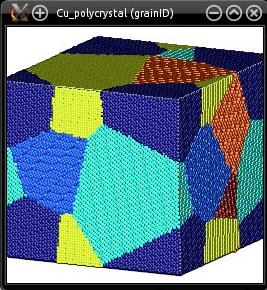
Here is the problem: in this polycrystal, there is no room for another phase. The whole box is filled with copper atoms. We need to make room for the tungsten grains. Remember that when constructing a polycrystal, Atomsk marks the atoms with their grainID, i.e. the index of the grain they belong to. The trick is to use the option "-select" to select some grains according to their grainID, and remove them:
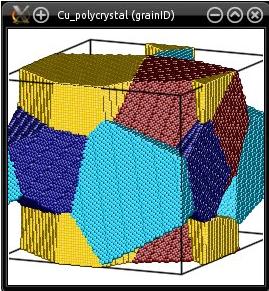
atomsk --polycrystal Cu_unitcell.xsf polycrystal.txt Cu_polycrystal.cfg \
-select prop grainID 1 -rmatom select -select prop grainID 6 -rmatom select
This command selects all atoms that have a grainID equal to 1 or 6, and then removes them. The copper grains then look like the following:
Now we construct the tungsten polycrystal. First we need a unit cell of bcc tungsten:
atomsk --create bcc 3.16 W W_unitcell.xsf
Then we have to make sure that the tungsten grains have exactly the same position and shape as the removed copper grains. The solution is simple: construct a tungsten polycrystal with exactly the same configuration file as the copper polycrystal ("polycrystal.txt"), and remove the complementary grains (i.e. here the grains 2, 3, 4, and 5):
atomsk --polycrystal W_unitcell.xsf polycrystal.txt W_polycrystal.cfg \
-select prop grainID 2:5 -rmatom select
The tungsten polycrystal looks like the following:
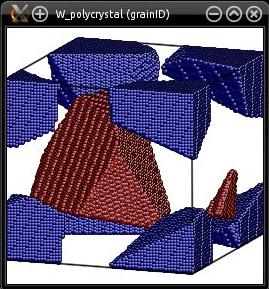
It is indeed the complementary to the copper system constructed previously. Note that only two grains remain (one is colored in blue, the other in red), but they may appear to be in several pieces because of periodic boundary conditions.
Now all that remains is to put all the grains together in the same box. This is achieved with the mode "--merge":
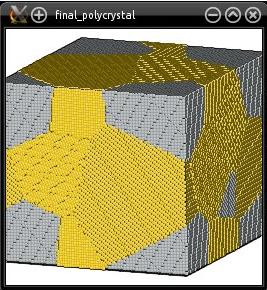
atomsk --merge 2 Cu_polycrystal.cfg W_polycrystal.cfg final_polycrystal.cfg
The number "2" indicates that there are two systems to merge. The final polycrystal is written in the file "final_polycrystal.cfg", and can be visualized e.g. with Atomeye:
This tutorial illustrates again that sometimes, you have to run Atomsk several times to achieve what you want. Although there is no "magic command" to construct multi-phase polycrystals, it is possible to construct separate polycrystals, remove some grains and then merge them together.
You may use the principles explained above to construct polycrystals made of two, three or more phases.